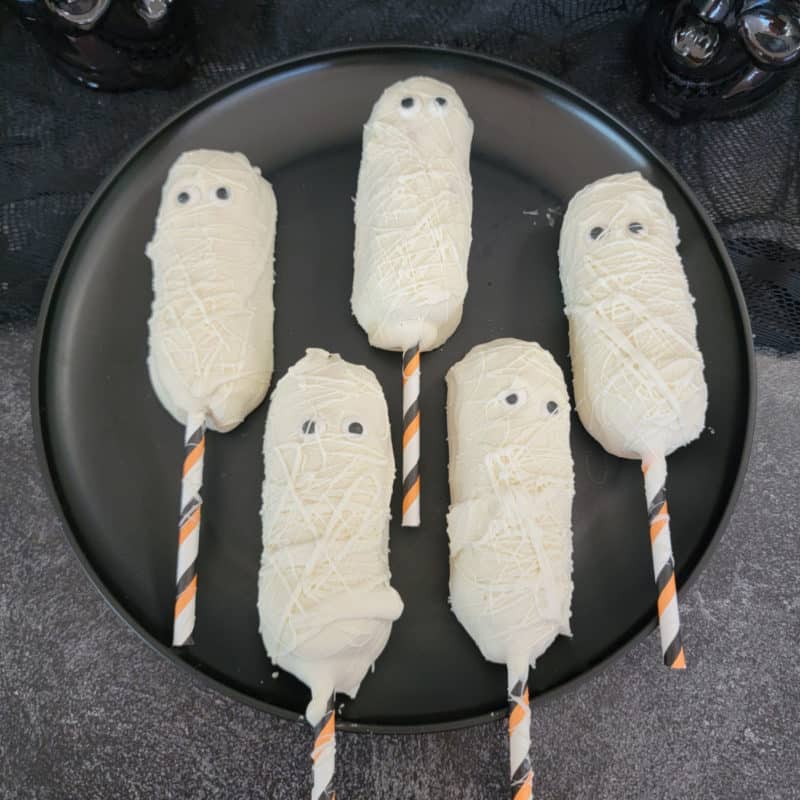
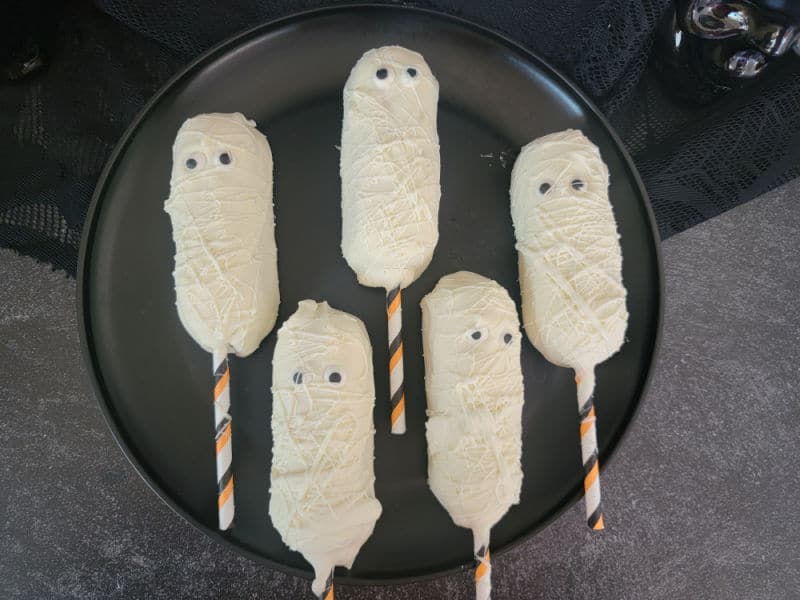
Easy Mummy Twinkies are the perfect Halloween dessert that is super easy to make. You only need a couple of ingredients for these Cute Halloween desserts.
Mummy Twinkies
Welcome to Day 3 of Mummy Week! So far this week we have shared Crescent Mummy Dogs and Mummy Donuts. Today we are sharing these epic cute Mummy Twinkies.
I am wondering if I should extend mummy week longer than 7 days. Now that I have started mummifying all the things I feel like I want to keep going.
I guess we need to get to day 7 before I start going farther, but my brain is definitely thinking about all of the things I can make for Halloween.
Normally I am not super crafty so being able to turn things into easy mummy desserts makes me so happy. Trust me if I can make these anyone can!
Upcoming we have Mummy Nutter Butters, Mummy Oreos, and so much more! My husband kept laughing at how many mummy treats I sent with him to work this week.
We even worked on this fun Mummy Dessert Board perfect for Halloween Parties or school events.
My goal is to share a ton of Halloween Treats that don't take hours to prepare. These Mummy Twinkies Pops are so easy to make and you don't have to turn the oven on to make them!
Pair them with our Frankenstein Twinkies to make a cute Halloween treat board!
Ingredients
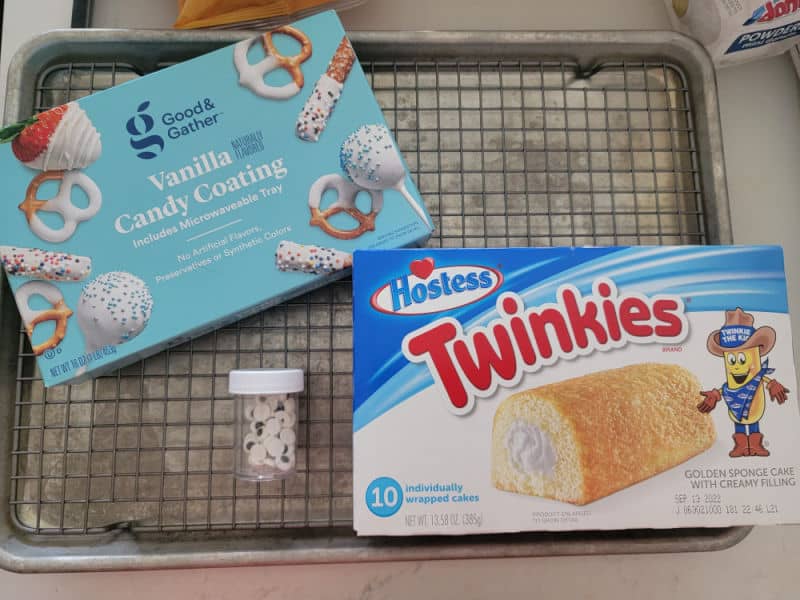
This is a quick overview of the simple ingredients that you'll need to make Twinkie Mummies! Specific measurements and step-by-step instructions are included in the printable recipe card at the bottom of the post.
- Hostess Twinkies
- Candy Melts
- Candy Eyes
Twinkies - We used original Twinkies but you can easily use chocolate Twinkies or whatever flavor you have available to you. You can even use homemade Twinkies
Equipment Needed
Large Mixing Bowl - Make sure to use a bowl that has space for the Twinkies to be dipped in. We used a spoon to cover the top portion of the Twinkies that were not completely dipped in the candy melt.
Halloween Straws - We trimmed the straws after the twinkies were set and ready to be served so we could size them to the platter.
Parchment Paper - Parchment paper makes it so easy to clean up after making these. It also makes it easy to remove the twinkies and not lose a portion of them due to them sticking to a pan. You can also use wax paper.
Baking Sheet - We are huge fans of these baking sheets with sides. You don't have to worry; you are going to move the twinkies and have them slide right of the side.
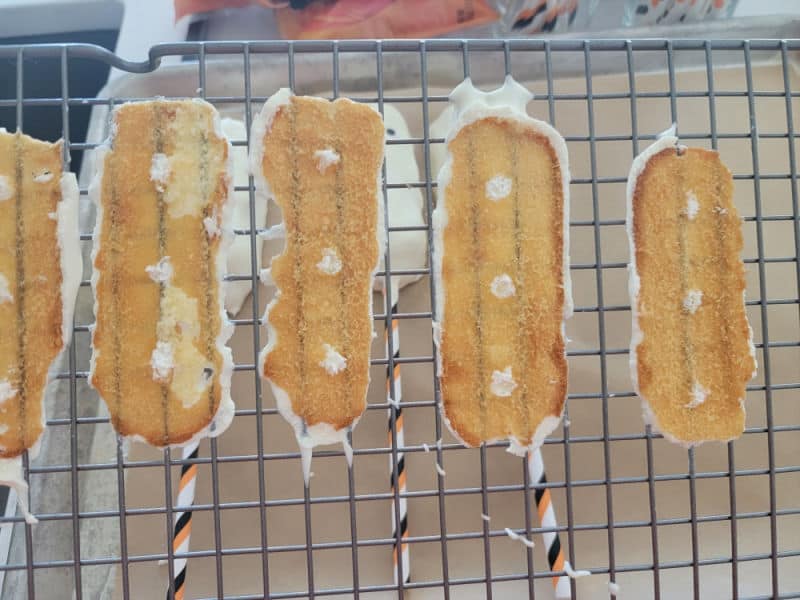
Drying Rack - We started making these on a drying rack and that was not the best idea. It sounded perfect for letting the excess candy melt to drip off but in reality, it ended up removing the bottom of the twinkies the first time.
I would definitely suggest using parchment paper until the overall twinkies are set. They will be easy to remove and you should be able to remove them without losing the bottom of the Twinkies.
Fork/Spoon/Plastic Baggy - I use a fork to drizzle chocolate mummy layers onto the Twinkies. You an also use a plastic baggie with a clip corner to pour the coating onto the Twinkies.
Knife - Use a butter knife or spatula to trim excess chocolate from the bottom of the twinkies and the sides once they are set.
How to make Twinkie Mummies
I've included complete instructions in the printable recipe card at the bottom of the post, but here's a quick version.
Step 1 - Unwrap all of the Twinkies, gather supplies.
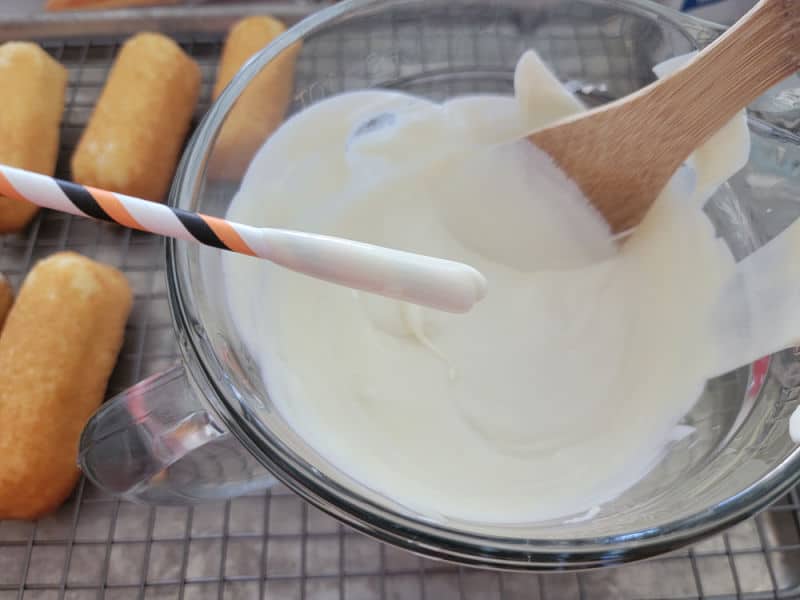
Step 2 - Melt candy melt in 30 second increments in the microwave, stir after every 30 seconds, until completely melted.
Step 3 - Dip straw in candy melt before inserting into individual Twinkie.
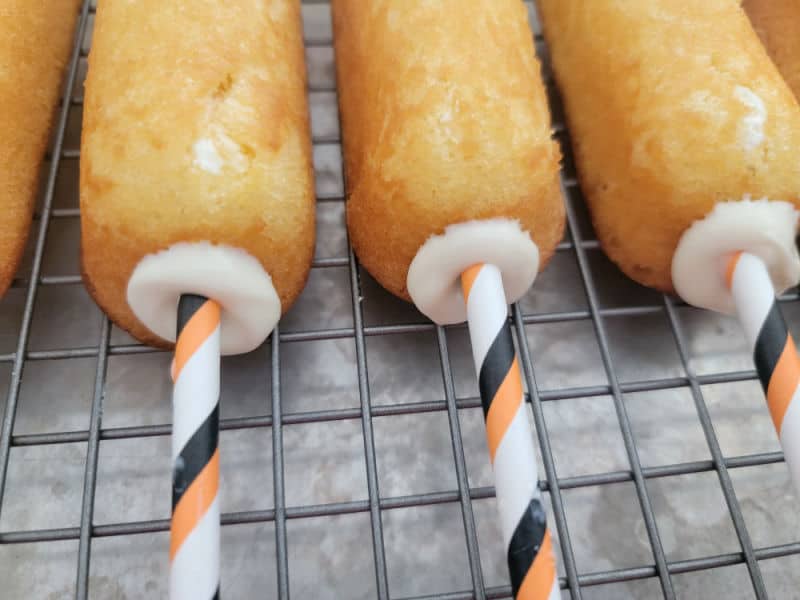
Step 4 - Allow to set before fulling dipping the Twinkie.
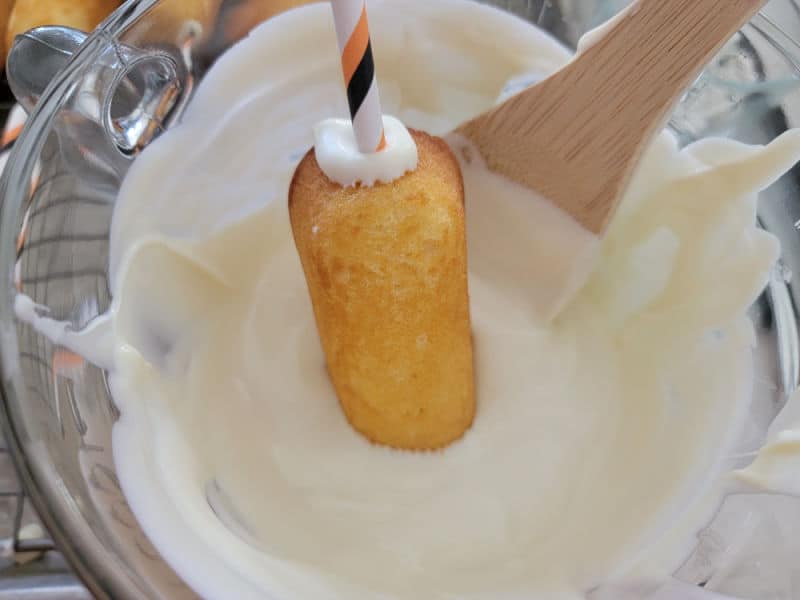
Step 5 - Completely dip Twinkies in candy melt/White chocolate. If your bowl is not deep enough you can use a large spoon to help spread the melted chocolate.
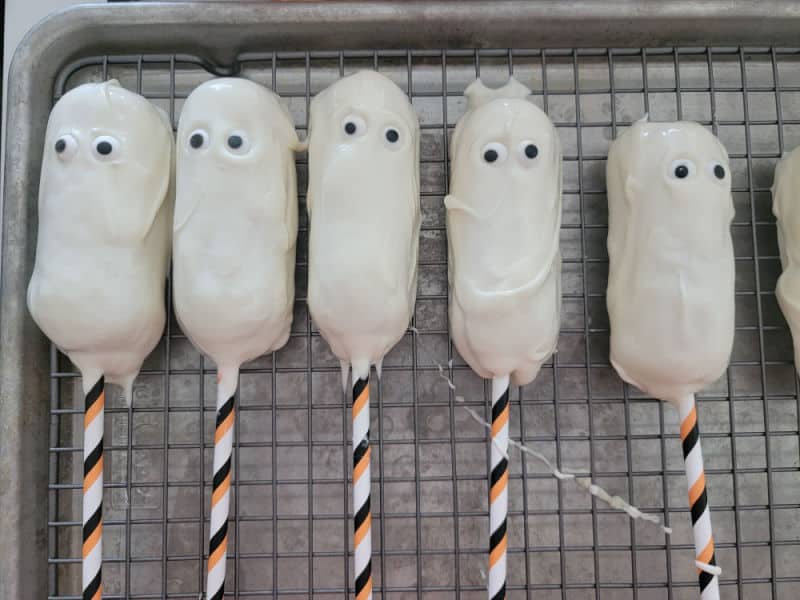
Step 6 - Add candy eyes and allow the chocolate to set. We do not suggest using a wire rack! A cookie sheet lined with parchment paper is the best place to rest your cute little mummies.
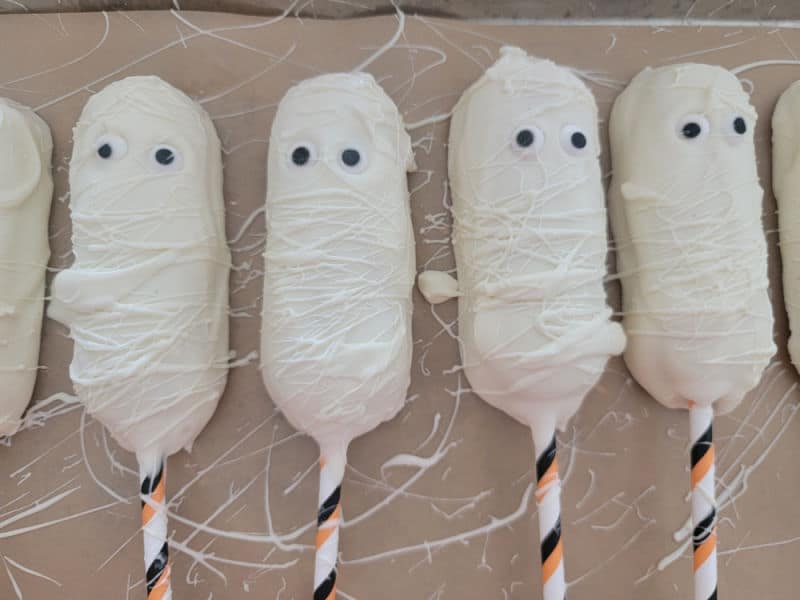
Step 7 - Once the base layer of white chocolate candy bark has set use a spoon to drizzle/spread additional candy melt back and forth to create the mummy bandages.
Optional - Use a disposable bag and clip the corner/ tip of the bag to create a disposable piping bag. Fill with melted chocolate and drizzle to create the small lines of white chocolate.
Allow to set before serving.
Preparation and Storage
Make Ahead – These can be made a day or two ahead of time just make sure to store the in an airtight container at room temperature.
Storage – Store Twinkies in an airtight container at room temperature. Try to keep them away from direct sunlight or in a warm area.
We do not suggest storing these in the fridge because the candy coating can start to sweat and get a bit off.
Freezing/How to freeze – These Mummy Twinkies can be frozen but the texture may change after they thaw.
Recipe Variations
Substitutions - Change out the Twinkies for your favorite snack cakes.
Vegetarian Option - Twinkies may contain beef fat listed as Tallow in the ingredients which makes them unsuitable for vegetarians.
Vegan Option –Twinkies unfortunately contain animal-derived ingredients, so they are not suitable for vegans.
Gluten Free - Twinkies are not gluten-free. Heavenly Crème Cakes is an option for Gluten Free Twinkies.
Smaller Serving Size – This recipe can be adapted to make a smaller serving of Twinkie Mummies. Just melt down the amount of vanilla chocolate coating you need.
Larger Group/More servings - This recipe can easily be doubled or more for large parties. I would work in batches so the chocolate covered twinkies have time to set before moving them to an airtight container.
What to serve with Twinkie Mummies
Drinks - Hot Chocolate, Pumpkin Spice Latte, Kool Aid Slushie, Oreo Milkshake, Freckled Lemonade, Sonic Ocean Water
Snacks - Monster Munch, Candy corn and peanuts, Pretzel Bones, Salted Caramel Popcorn, Pumpkin Rice Krispie Treats, Frankenstein Rice Krispie treats, Bloody Bandages, Candy Corn Bark, and of course a lot of Halloween Candy.
Main Dish/Entrée - Halloween Pasta, Mummy Dogs, Mummy Quesadillas
Desserts - Pumpkin Rice Krispie Treats, Frankenstein Rice Krispie treats, Witch Hat Cookies, Reese's Bats, Marshmallow Ghosts, Pretzel Skeleton Bones, and of course a lot of Halloween Candy.
When to serve
- Halloween Parties
- School parties
- Sweet treat
- Trick or Treating
- Movie Night
- Fall picnics
- Office parties
- Kids After school snack
Great Halloween Recipes
Pumpkin Spice Rice Krispie Treats
Check out these Great Halloween Recipes
Do you love recipes? Check out our copycat recipes, dessert recipes, and our CrockPot Recipes.
Follow Tammilee Tips on MSN, Facebook, Instagram, Pinterest, and Twitter for all of our recipe posts.
Mummy Twinkies
Ingredients
- 8 Twinkies
- 16 Candy Eyes
- 1 package Vanilla Almond Bark
Instructions
- Unwrap all of the Twinkies, gather supplies.
- Melt candy melt in 30 second increments in the microwave, stir after every 30 seconds, until completely melted.
- Dip straw in candy melt before inserting into individual Twinkie.
- Allow to set before fulling dipping the Twinkie.
- Completely dip Twinkies in candy melt/White chocolate. If your bowl is not deep enough you can use a large spoon to help spread the melted chocolate.
- Add candy eyes and allow the chocolate to set. We do not suggest using a wire rack! A cookie sheet lined with parchment paper is the best place to rest your cute little mummies.
- Once the base layer of white chocolate candy bark has set use a spoon to drizzle/spread additional candy melt back and forth to create the mummy bandages.
- Optional - Use a disposable bag and clip the corner/ tip of the bag to create a disposable piping bag. Fill with melted chocolate and drizzle to create the small lines of white chocolate.
Kitchen Tools
- Large Mixing Bowl
- Parchment Paper
- Parchment Paper


Leave a Reply